While it was far more common during the twentieth century, many homes to this day utilize underground storage tanks (UST) to store petroleum for the stove and heating. However, before 1988, these tanks were bare steel, making them vulnerable to corrosion.
These inadequacies can lead to hazardous oil leaks on your property. If you think you might have a UST under your lawn, understanding the removal process of underground oil tanks will help guide you as you clean up your property.
Why You Need To Remove Them
As mentioned with the bare steel, the methods for making underground tanks were not nearly as advanced or regulated as it is today. In 1988, the EPA stepped in and placed regulations on USTs, solving many problems with older models. However, as homes upgraded their heating systems after decommissioning these USTs, they were left in place rather than removed. Even though most tanks don’t cause hazardous leaks, many can do so. That’s why you should remove any out-of-service tank from your property.
Testing the Tank and Soil
The first thing you’ll need to do once locating a tank is to get the soil around it tested for containments. You’ll need an environmental specialist to test if the tank has broken open, causing any hazardous material to leak into the soil. Also, besides checking to see if it’s broken, they will try to identify any oil or petroleum still inside.
Hiring Contractors and Gaining Project Approval
Once you are ready to remove the tank, you’ll need to contract an environmental cleaning service to remove the UST. Local environmental specialists are familiar with the city, state, and federal regulations for handling a removal process. They can guide you through the necessary permits and government approvals required.
Closing and Cleaning the Tank
Typically, 30 days after gaining your project, you can begin the process of removing the tank. If the tank is leaking, you will need to “close” it before removing it. Closing is when contractors inert and clean the tank to keep any toxic vapors from releasing into the air during the excavation.
Excavation
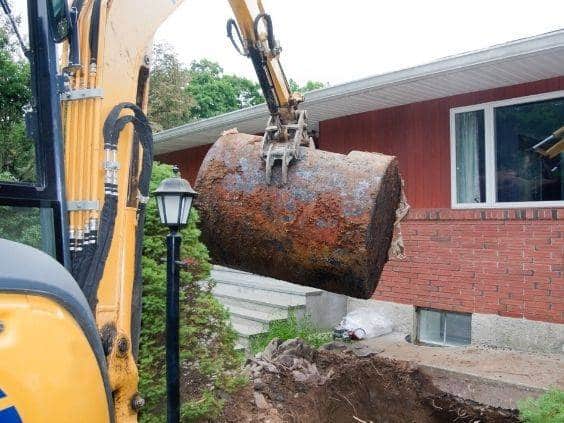
Once the tank is safe for removal, contractors will dig it up and remove it from its hole. Then, they will inspect the soil one final time to ensure that there isn’t any hazardous material in the dirt. Finally, with approval from a local inspector, you can fill in the hole.
Now that you have a better understanding of the removal process of underground oil tanks, hopefully, you won’t feel overwhelmed or under-informed throughout this procedure.


